Troubleshooting TERM BLOCK HDR 3POS VERT 3.5MM (5452093) Issues
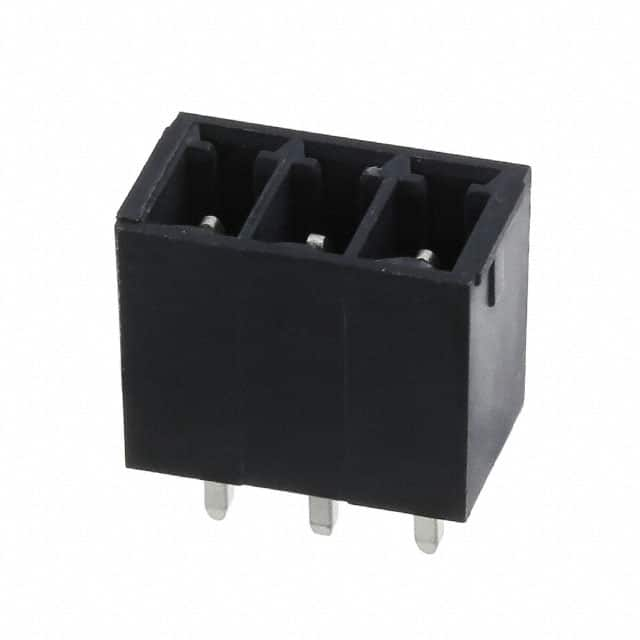
In my years supporting Phoenix Contact customers, the 3-position 3.5mm vertical header (SKU 5452093) has been one of the most reliable interconnect components in the field. However, when it fails, the symptoms often point to the component when the real culprit is elsewhere. This guide covers what I have seen in real applications, from industrial control panels to medical device prototypes.
Typical failure modes and root causes
The most common failure is intermittent open circuits at the wire termination point. The 3.5mm pitch header uses a screw or push-in clamp mechanism, and over-torquing or under-torquing the screw will cause the wire to loosen over thermal cycles. In one case, a customer's conveyor controller had random shutdowns after six months. The root cause was a stranded wire that had been tinned before insertion, creating a cold flow under the screw. The tin deformed, the clamping force dropped, and the contact resistance rose to over 2 ohms. Another frequent issue is solder joint cracking at the PCB interface. Because the header is vertical and often used with cables that apply lateral force, the through-hole pins can fracture if the board is not properly supported. I have also seen plastic housing deformation from soldering temperatures exceeding 260°C for more than 10 seconds, which shifts the pin alignment and makes mating difficult.
Step-by-step debugging methodology
Start with a visual inspection under 10x magnification. Look for discoloration on the plastic body (a sign of overheating), cracked solder fillets, and any debris in the wire clamp. Next, perform a continuity test from the wire to the PCB pad while wiggling the wire gently. If the resistance changes by more than 0.5 ohms, you have a termination problem. Then, measure contact resistance using a 4-wire Kelvin setup. A good connection should be under 10 milliohms. If it is higher, re-terminate the wire and retest. If the resistance is still high, remove the header and inspect the PCB pad for damage. Finally, apply a thermal camera or IR thermometer while the circuit is under load. A hot spot at the header indicates high resistance, which will eventually lead to failure.
Common mistakes in schematic design and PCB layout
One mistake I see repeatedly is using a 3.5mm header for signals that carry more than 8A per contact. The 5452093 is rated for 8A, but that assumes a single wire in free air. Bundle three wires together and derate to 6A. Another error is insufficient annular ring on the PCB. The pin diameter is 0.9mm, so the pad should be at least 1.8mm outer diameter with a 1.0mm hole. If the annular ring is too small, the pad will lift during rework. Also, do not route high-current traces directly under the header body. The plastic can soften and allow the pins to shift. I have also seen designers place the header at the board edge with no strain relief, so any cable pull transfers directly to the solder joints. Always add a cable tie or mounting hole within 20mm of the header.
How to verify component authenticity and quality
Counterfeit Phoenix Contact headers exist, especially on third-party marketplaces. Check the laser-marked branding on the plastic body. Genuine parts have a crisp, white "PHOENIX CONTACT" logo and the part number. Counterfeits often have blurry or missing markings. Next, measure the pin spacing with calipers. The pitch must be 3.50mm ±0.05mm. If it is 3.45mm or 3.55mm, the header will not mate reliably. Also, weigh the part. Genuine 5452093 weighs approximately 1.8 grams. A counterfeit often uses recycled plastic and weighs less. Finally, check the screw torque. The specified torque is 0.2 Nm. If the screw strips at 0.15 Nm, the metal insert is substandard.
Measurement techniques and test equipment
Use a 4-wire milliohm meter for contact resistance, not a standard 2-wire DMM. A 2-wire measurement includes lead resistance, which can add 0.2 to 0.5 ohms of error. For thermal testing, a thermal camera with at least 320x240 resolution will show hot spots. If you do not have one, use a type-K thermocouple glued to the plastic body with thermal epoxy. For vibration testing, a shaker table at 10-55Hz, 1.5mm amplitude, will reveal loose terminations in minutes. Finally, use a micro-ohmmeter with a 1A test current to detect partial fractures that a standard DMM misses.
When to suspect the component vs. the surrounding circuit
Suspect the header if you see mechanical damage (cracks, bent pins, stripped screws) or if the resistance changes when you flex the wire. Suspect the circuit if the header passes all mechanical and electrical tests but the signal is still noisy. In one case, a customer replaced three headers before we found that the real problem was a missing ground plane under the connector, causing crosstalk between the 3.5mm pins. Another case involved a 24V supply that had 2V of ripple. The header was fine, but the ripple caused the screw terminals to arc and pit. Always verify the circuit first with a scope before condemning the header.
Real-world case studies
A medical device manufacturer had a 5% field failure rate on a patient monitor. The 3-position header connected a battery pack. The failure was intermittent power loss. We found that the header was mounted vertically, and the battery cable was routed upward, pulling on the connector. Over time, the solder joints cracked. The fix was to add a strain relief clamp and switch to a right-angle header. In another case, an industrial robot controller had a 3.5mm header for a thermocouple input. The readings drifted by 10°C. The root cause was that the customer used a push-in wire that was too thin (0.5mm² instead of 0.75mm²). The clamp did not bite into the conductor, and the contact resistance changed with temperature. Re-terminating with the correct wire gauge solved it. Finally, a customer complained that the header plastic melted during reflow. They were using a lead-free profile with a 260°C peak for 15 seconds. The datasheet specifies 260°C for 10 seconds maximum. Reducing the time to 8 seconds eliminated the deformation.
In summary, the Phoenix Contact 5452093 is a robust component, but it is not indestructible. Most failures come from improper wire termination, mechanical stress, or thermal abuse. Follow the torque spec, use the correct wire gauge, add strain relief, and verify authenticity. When in doubt, measure contact resistance with a 4-wire method and compare to the 10 milliohm specification. That will tell you whether the header or the circuit is at fault.